Saturday, October 6, 2012

Easy Fall Wreath . . .

I have visited our local craft store a lot lately trying to complete some craft orders.  While I was at Michaels, I decided to make a fall wreath.  I like the look of the raw grapevine wreaths, so I purchased a medium sized one.  I also purchased 3 fall picks (these are in the fall decor section and are usually cheap).  Thankfully it was all come together and I headed back to the wood crafting department and purchased a letter "y" in a cute font.  I already had ribbon, so I paid and headed home.
I like my little wreath.  It was fun, easy, and CHEAP!  Can't beat that!

The purchasing breakdown:
14" grapevine wreath - 3.99 - I used my 40% off coupon.
3 fall picks- 1.99 each - on sale for $1 each
Letter "y" - $1.50. (this was black, and I wanted it mustard yellow, so I sanded it and painted it).
I already had the ribbons.


HAPPY FALL!

Tuesday, May 22, 2012

Skeleton, Senses and Organs- Oh my!

Summer break came quickly and up until 2 weeks ago, I had NO CLUE what I would do (learning wise) with my kiddos.

I have to keep some sort of structure with the kids or else things just get crazy.

For summer I always try to take a broad theme and something that will interest my 4yr old, 6 and 8 yr old alike (which isn't an easy tasks!).  Something that I can incorporate learning along with fun hands on crafts and even a Bible lesson too.

So, my title to this post tells it all . . . we will be learning a little about the human body.

Some materials I will be ordering from Amazon.com.  They are the following: 

1.  A boardbook titled "Uncover the Human Body" which is a great little hands on and visual tool!
http://www.amazon.com/gp/product/1571457895/ref=ox_sc_act_title_1?ie=UTF8&m=ATVPDKIKX0DER
2.  A flip book titled, "GeoSafari Human Body Uncoverer."
http://www.amazon.com/gp/product/B0007CK27C/ref=ox_sc_act_title_2?ie=UTF8&m=A25B9YDR0B8OUT
3.  And an Usborne book called, "See Inside Your Body."
http://www.amazon.com/gp/product/079451233X/ref=ox_sc_act_title_4?ie=UTF8&m=ATVPDKIKX0DER

A friend also shared a neat website with me called, www.Homeschoolshare.com.  We will be making the human body lap book off of there as well.  I know my crafty kids will love it! http://www.homeschoolshare.com/my_body.php

We are also going to talk about the 5 senses, in which we will also learn some simple sign language (there are some fantastic kids videos on youtube!).  We will also talk about the human body from a Biblical perspective- heart, mind, why and how God created us etc.

Then we will also use this fantastic idea from 'Over the Moon' blog.  http://www.overthebigmoon.com/summer-jar-list-updated/

This will keep us busy with some fun crafts and activities for the summer!  I am also going to have a notebook for my 3 older ones to make a little journal and scrapbook about each activity.  SO FUN!!!!

Stay posted for posts throughout the summer on things we do, learn and create! 
Happy Summer Break!!!!

Friday, May 11, 2012

Happy Adoption Day!!!

As Noah's adoption day is coming up, I can't help but sit back and think of all that God brought us through to get us to our son Noah.  It is kinda like a fireworks show that you sit through, you're amazed the first 25 minutes at the booms and the various bright colors shooting into the sky but then wow! . . . the last 5 minutes (aka Grand Fanale) are just breathtaking and almost indescribable!  To the point you find yourself walking away in amazement and awe.

Our journey with Noah began in December 2009.  Between March and May of 2010, we were matched twice and they both fell through.  One of those instances we just knew this was it- everything had fallen in to place, it seemed like the perfect situation for us and we were just thrilled and excited.  Friday we received the call that the baby had been born and by Monday the birthmom deicded to take him home.  It was one of those blurr things that just didn't make any sense.

In June and July we felt like maybe we should search out more options to be matched, but that never really took off.  Honestly we were feeling a little worn down.

Then August 11, 2011 we received the call.  After working out the details, we were matched with a newborn baby boy in Pennsylvania.  He was 1 day old.  And the area he was from, was where Dan grew up. 

We quickly packed, I remember just throwing things in the suitcases and then having to repack because I was so nervous, excited and anxious to get there that I wasn't sure what I had even packed the first time.  We left the house at 8pm that evening to drive through the night to meet our soon to be son.

We arrived in Pennsylvania at 5:45am.  We unpacked, said hello to our family and then quickly showered and left the kids to head up to the hospital to meet this baby boy.  We were like two nervous giddy teenagers, chatting and wondering what to expect when we got there. 

Once we arrived at the hospital we realized that the birthmom had not waited for us and already left without signing papers.  Things were not going as planned!  After working out some issues we were allowed to meet our precious baby boy. 

This was the part that was like the Grand Finale . . . he was perfect, amazing and breathtaking!  It was very surreal that this boy was our son!

His adoption wasn't finalized until 9 months later, in which this Sunday (May 13th) marks the one year anniversary.

I am still in amazement and awe of the process God took and brought us through to get Noah.  When we felt like nothing was working out for us, he brought us to an "awe" moment of meeting our son (from the same town Dan is from- did I mention that :))!

Our little man isn't so little anymore.  We love him to pieces and I am so thankful to call him son!!!

Those that supported and prayed for us along the way will forever hold a special place in our lives!

Happy Adoption Day Son!  We love you!!!

Thursday, May 10, 2012

My paint obsession . . .

I love color and changing the looks of things, whether it be a wall, a room, a piece of furniture or a canvas.  It has become a little obsession of mine - or may we say a new hobby!


I purchased a piece of 70's furniture that I want to refinish into a TV stand.  It's unique and I just couldn't pass it up for $35! 
However, it has been sitting in my garage covered in primer for a good month now.  I am stumped on what color or how I want to refinish it.
After doing some research I discovere the awesome new paints that are out there and I just couldn't keep them a secret!

The first paint is called Chalk paint . . . don't get this confused wtih chalkboard paint. 
The variety of colors that chalk paint comes in is more limited than your local home improvement store, but they do  have some amazing colors available.

The cool thing about this product is you don't have to prime or sand your piece before painting. Sure wish I would've discovered this back in March!!!
The cans come in quart size only but from what the reveiws say, this small can covers 140 sq feet.  And also keep in mind you are not having to purchase sanding tools or primer.
The finish will be a chalkly like matte finish but you can create a more glossy finish by waxing the finished piece or applying a poly coat (super easy!).

Check this site out for some awesome tips and photos and videos of how to's, along with the pros and cons!  http://www.perfectlyimperfectblog.com/2011/06/chalk-paint-faqs.html

To me the pro's greatly outweigh the cons.  Annie Sloan has created a unique product  and I can't wait to try it!

Here is a link to the colors that are available:  http://www.anniesloan.com/acatalog/United_Kingdom.html

Tomorrow we will take a look at Milk Paint and how to use it . . .

Friday, April 20, 2012

Fish + Picket Fence Slat = Cute Wall Decor!!!

So, I was fishing around (get it, "fishing" haha!) for something to put on my kids bathroom wall that I hope to repaint blue soon. I wanted to do something unique and creative in there but time these days just doesn't permit and honestly I couldn't come up with anything that was gender neutral since our kids share the bathroom.
So, I got on one of my favorite sites - www.etsy.com . . . check it out if you haven't! I love looking at things people make and sell!
That is when I saw some super cute fish that a lady had hand painted out of picket fence slats. They were AdOrAbLe!!! And of course the price was pretty not so adorable . . . that is what people don't understand about artwork sometimes is the time and effort it takes in coming up with these creative ideas and then finding the right materials to use and then the actual painting and creating time. It can be pretty time consuming, so keep that in mind when looking at purchasing original artowrk vs something at your local home decor store :).
Right away the light bulb went off and a few days later I went to one of my favorite places, LOWE'S! I ended up purchasing raw wood because the slats were treated and I wanted to start fresh. The wood I purchased was a precut peice from their precut section (which is Fabulous!!!) and it was like $3 per board . . . I purchased 4.
I came up with a template and then my awesome hubby cut them out . . . I tried working on the new Scroll Saw but I felt like after ruining one piece of wood that I just wanted it done right. That's right, I am not a woman of patience . . . I am working on that!!! PLUS Dan really likes that part, so I feel like we are working together. He cuts, I design and paint. TEAM WORK!!!
So after he cut out the fish shapes, I designed the colors etc and then began painting. After painting the first layer on I let it dry for a day. Then I painted on the 2nd design layer. I let that dry for a full day and then I sanded the edges to give it a worn look. I then took a little walnut stain on a rag and aged the edges and parts of the fish.
Add a saw tooth hanger on the back and TADA!!! a fabulous new wall art for about $20!

Friday, April 13, 2012

Stinky Disposal and Dirty Dishes . . . Blech!!!

If your GARBAGE DISPOSAL is anything like mine, it can get quite a stinch sometimes . . . shewwweee!!!
So, here is something I plan on trying today to get rid of that nasty odor!

*Fill a 2cup measuring cup with ice and white vinegar. Turn your disposal ON and begin pouring the ice/vinegar mixture into the running disposal. The ice will help losen up any stuck grime and gunk and the vinegar of course helps with the smell.

*Another stronger solution is while the disposal is off pour in some baking soda then some vinegar into the drain disposal. Wait a few minutes. Then run hot water a few minutes to rinse all the gunk out. The reaction of the soda and the vinegar will cause a chemical reaction to remove the nasty grime.


DISHWASHERS can get to where they don't clean the grit off of the dishes great, so here is a few tips to try that might help . . .

1. Check the filter at the bottom of your dishwasher (it is usually under the spin thing on the inside bottom of the dishwasher . .. like all my technical terms?) :).
2. Put vinegar in a cup on the top rack of your dishwasher and run it on a full cylce without dishes in it and the vinegar will help clean it out. OR you can use 2 or so packets of lemon non-sugar koolaid packets. Simply put the powder into the powder dispenser and turn on your dishwasher without dishes in it. The acid will help clean it out.

Here is a link that gives step by step instructions on giving your dishwasher a cleaning tune-up . . . http://thequickandthehungry.blogspot.com/2011/08/diy-dishwasher-tune-up.html

Happy Cleaning!!!!

Wednesday, April 11, 2012

Lemons, Lemons, Lemons!!!

I love the clean smell of lemon . . . here are a few cool tips and thrifty ways to use fresh lemons.

*Lemon-Milk Alpha Hydroxy Mask
Both fatty milk and lemons contain Alph Hydroxy Acids and when mixed they boost each others AHA.

1-1/2 Tbsp full-fat milk
1-2 tsp freshly squeezed lemon juice
1 small wedge of sliced lemon
Small bowl
In your small bowl, combine the lemon juice and milk. Stir well, and dunk in the lemon wedge. Leave this on the counter (do NOT put this in the refrigerator, or you stop the bacterial process that you want). It will curdle and look funny; this is good.
After 3-4 hours, spread it on your clean face and leave on for 15-20 minutes.
Rinse well.(Note: Be careful for a few hours if you’re going out in the sun after this mask, as it will cause photosensitivity.)
**This is known for softening skin tone and facial skin as well!!!

Another lemon tip is mix the lemon peel in with your homemade vinegar cleaners to give it a fresh lemon scent!

Lemon is also known for helping heartburn.

Tuesday, April 10, 2012

Mayonnaise for cleaning???

Ever purchase a breakable or picture frame and the price tag had been put right on the front of the item or on the front glass of the picture frame??? Ugggh!!! I bought a cute platter on the clearance isle at Ross' over the weekend and sure enough, I couldn't get the price tag off. UNTIL I got out my mayonnaise and rubbed it on the sticky goo! That's right, mayonnaise!!!!

It's easy, simply rub it all over the sticky goo and let it sit for a few minutes and then rub it off. It got ALL of the sticky goo off in one swipe!

Sure wish I had known that trick when we bought a china cabinet 4 years ago and they taped the entire front and sides glass with maskingtape . . . .

Monday, April 9, 2012

Time to clean . . . . better for you and the environment!

We've been busy busy busy with various projects . . . all of them are still in the works so I hope to finish a few soon and post some pics :). Gotta love projects!!!! I sure do!

I've been experimenting a little with homemade cleaners. I use to make my own detergent for the wash machine so why not expand that into some easy, better for you and the environment and cheaper on your wallet homemade cleaners!

Today's post is a super easy and cheap Glass Cleaner ~
The items you will need are as follows:
1/4 cup of rubbing alcohol
1/4 cup of white vinegar
1 tbspn cornstarch
2 cups of warm water
1 spray bottle - you can purchase these on the cleaning isle at Target or Walmart or just use an old Glass Cleaner bottle like I did- rinse it out well with warm water.

Simply dilute the cornstarch in your warm water and then pour it into the spray bottle along with the other 2 ingredients and shake to mix well.
Make sure you shake well each time before using so that the solution mixes well and this also helps the sprayer to stay unclogged.

Want another neat tip for cleaning windows and glass? Crumple up an old black and white newspaper sheet and wipe the cleaner off with that instead of a rag. It makes is sparkle and shine!!!!

This glass cleaner costs about .50 per bottle to make and is non-toxic and better for you . . . not to mention the SpArKly mirrors and windows you now have :)!

More cleaning posts to come!!! Stay tuned!

Wednesday, February 8, 2012

Building Character Chart . . .

Being a mom of 4, I feel like I take two steps forward one week and then 4 steps back the next week in the area of discipline, kindness and good character. I am always looking for creative ways to speak character into my kids.
I found this on etsy.com and LOVE the idea!
Kids are pulled in so many different directions in today's society- to put self first and to follow what's cool and not necessarilly what is right. This little chart is neat to help build different positive qualities in your child (and I am sure as moms we can learn a lesson or two ourselves!).
It is a children's character building chart. The cool thing is you can purchase it if you aren't crafty like that, or if you like to save money and make your own, then that is also an option.
She has other images on there that help explain it as well.
So, get busy and go build character!!!!!!!

Friday, January 27, 2012

Photo Wall Squares - this weekends project!!!

So, my last post was a fun (cute and cheap!) wall decor project!!! As I have said, I LOVEEEEE to be crafty, but the craft has to have a purpose and a place. Well, I still haven't decided if I wanted to make the wall squares for my office room to replace a picture wall collage I have had on my wall for some time, or in my dining room that is waiting to be redecorated. So, when I saw this AWESOME take on this cute project I knew exactly where I wanted to put it. My girls room has a decent size wall where a baby canvas is hanging that I painted for above Camille's crib. Well, needless to say, the crib has been moved out since 2010 and has been replaced with a kitchen playset. I have been wanting to remove the canvas and redecorate that wall for sometime . .. ok, for a LONG time and this project just hit the spot! I just love it (and did I mention it too is cute and cheap to make!?!).


Check out this blog by Jeni. She has some really cute ideas on here.
http://jensidea.blogspot.com/2011/12/photo-block-art.html

I can't wait to go get my crafty goods and begin this fun and cute (and CHEAP!!) project :)!!! I will definitely post some pics when it is finished.

Friday, January 20, 2012

Easy Cheap Wall Decor Idea . . .

So, I love to craft, and I love to decorate but it seems these days there is little time for either!

However, this neat crafty wall decor idea is one I will be trying very VERY soon :)! Maybe even tomorrow while the boys of the house are having a daddy/son day.

I have this large wall space in our office room that I have wanted to redo for a month or two. I saw this neat and cheap make-it-yourself wall idea and it hit me that that's what I wanted to try for this space!


Items you will need:


  • 1' x 10' shelving board from Lowe's (they can cut it down for you if you ask them into 12"x12" squares).


  • From Hobby Lobby or Michaels purchase 9 pieces of 12x12 scrapbook papers that coordinate. For my project I will be using Blacks, reds, creams and gray. All 9 pieces should blend and coordinate.


  • 1 tube of dark colored paint that coordinates with your paper. Stick with Black or Espresso Brown or Navy.


  • 1 foam brush to adhere paint to wood edges.


  • Spray Adhesive or Watered down craft glue.


  • Distress Ink to distress the edges of the finished product.


  • 9 picture hangers.

    Instructions:

  • Paint your 12x12 cut wood pieces with the dark colored craft paint you have purchased.


  • Allow to dry for 30 minutes or so.


  • You might need to add another coat depending on the coverage.


  • Take and lay out your 9 boards and spray the boards with the adhesive or apply glue. Be careful that you don't allow your paper to ripple or tear. If you are using the spray adhesive, use it on a protected surface and in a well venhilated area.


  • Apply the paper to the surface. Do this for all 9 boards.


  • Allow to dry well.


  • Take your Distressing ink and rub it on areas of the edges.


  • After this part has dried, attach your hanger to each piece and . . .


    • TaDa! you have some neat artwork for under $20!!!


      Thursday, January 19, 2012

      'I spy' a fun project with kids!!!

      This is a fun hands on cheap and easy craft to do with your kids and it is useful after you make it (we love crafts that are useful!)!! It's an "I Spy" bottle.

      First of all here are the items you will need:

      1 empty clean DRY plastic bottle
      a bag of cheap white uncooked rice
      funnel
      large bowl
      small items from around the house that will fit inside the bottle mouth (use 10-15 items)
      glitter (optional)
      hot glue gun
      a 6" strip of ribbon
      paper to list the items on
      hole punch

      Empty the rice into a large bowl. Have your child hold the clean/dry bottle over the bowl and fill the bottle with several scoops of rice using the funnel.


      Add in 3 of your items - make sure to keep a list of the items. And if you use several of the same items make sure you write down colors.
      Add a few more scoops of rice.


      Add in several more of your trinkets.

      Add in glitter (optional) - the glitter just gives it a fun look! We call it the magical dust. :)
      Keep layering, making sure to keep a list of all the items you put into the bottle.
      Only fill the bottle to the neck so that there is plenty of room to shake.

      Once your bottle is filled and complete, squeeze glue from your hot glue gun around the mouth of the bottle and quickly screw on the lid tightly. Go ahead and tie ribbon around covering the overlapping glue.

      Cut out a rectangular piece of paper and type or handwrite the items inside and enjoy finding all the goodies!!!

      Saturday, January 14, 2012

      My first furniture project - table complete!

      Our kitchen table is 10 1/2 years old and looks it! It has seen better days that's for sure!!! I have had a table idea in my mind for about 6 months now so back in October 2011, I decided to make some plans for Dan to build it (which he is awesome at!) and then I would paint and distress it. It ended up being a bigger project than I thought though, which every project seems to turn out that way :)!
      He built the top from wood we purchased at Lowes - pine wood since it distresse easily.
      Then he built the skirting. The legs were a little bit harder to find . . . I didn't care for the size at Lowe's, and ordering the legs online was EXPENSIVE!!! ($60 per unfinished table leg!) So, then I remembered Craigslist- I actually got really really lucky and found a guy in Greer who had a lot of unfinished farm style tables listed. And after emailing him he allowed me to just purchase the table legs - YAY!!!!
      Here is Dan putting the unfinished table together ~
      For the top of the table, we literally beat it to distress it . . . we used a hammer, wire brush, chain and sand paper. It was very stress relieving!!!
      Then I wiped it with a clean cloth and gave it a good coat of dark walnut minwax stain on the top and underneath.
      I distressed it again on the edges using a medium grit sand paper. And repeated the process of wiping with the clean cloth and lightly restaining those sanded areas.
      I let it dry for several days and then coated it with 3 good coats of satin poly clearcoat (sanding with a very fine sand paper in between coats). Make sure to let each poly coat dry for at least a day (we let it dry for 2 days in between). We gave the underneath side one good coat.
      This was the finished product of the top of the top ~

      For the table skirting and legs . . .

      We picked out a red - a darker rich red.

      I gave the entire body 4 to 5 good coats of the red paint, letting each coat dry well inbetween.

      I then used a medium grit sponge sander ($5 for a 2pk at Lowe's) and began to age the legs.

      To give it the really aged look I took the dark walnut stain that I used on the table top and with a small canvas style paint brush I painted the stain on the areas I had sanded and also on the areas I wanted to have shadowing. Then I used a rag and gently wiped the stain. A little trick I learned is the amount of pressure you use in wiping away the stain with your rag matters!!! It became a technique!

      Allow it to dry overnight.

      Here is a pic of the finished legs~

      The table is complete!!!

      Saturday, January 7, 2012

      Time for a new door!

      So, our back sliding glass door (which I wasn't a fan of anyways!) has been needing replaced for a year now. I am actually kindof glad because I didn't like the door anyway! The builders installed this el-cheapo door without a drip pan (I know I sound all knowledgeable and all!!!), so water has slowly been rotting away the trimming and floor underneath. Nice huh? We have the french doors ordered and Richard should be calling us in a week or so to install them!
      And so begins our projects!!! :)

      Having the door replaced has given me the itch to redo more things. We have been in our house for almost 6 years now, and I am ready for a new look in some of my rooms. Since I am a stay at home mom, we do have to work on a budget, so it will be a slower process but fun!!!

      The kitchen will be a constant work in progress as I am still thinking about paint colors and possible floor and countertop redo's! YAY!!!! Reasons for me to go to Lowe's! I love Lowe's!!!


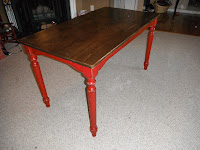
      We are also currently working on a kitchen table that we have built ourselves. Pics to come soon!!!


      I love blogs that inspire me too - http://ourvintagehomelove.blogspot.com/2011/05/kitchen-makeover.html is the pic above. I will have a post on blogs later :).